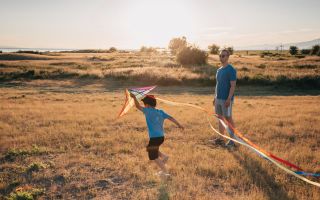
Days with more hours of sunshine are coming and kids want to spend more time outdoors enjoying game afternoons with their friends. Do you need ideas to keep them entertained? You are going to love this DIY project: learn how to make a paper kite for kids.
Do you know where kites come from?
There are different theories, but most agree that it was in China more than 2,000 years ago. Legend has it that a Chinese named Muo Di was inspired by a falcon that flew without flapping its wings.
The kite reached Europe in the 13th century, although its popularity in the West did not become a reality until the late 16th century. Throughout the world we can find various festivals and traditions, for example, in India, they celebrate the festival of Uttarayan, and in Colombia the Festival of the Wind or Las Cometas de Villa de Leyva. Are you ready to learn how to make a kite at home?
If you have no idea how to make a kite out of paper, don’t worry. It is not necessary to be a craft professional and we are going to help you with some simple instructions and several options so that you can choose the one that is easiest for you.
Children will love spending an afternoon making a kite from scratch and then being able to play with their kite and compete with their friends to see who can fly it the highest.
You just have to know the materials you will need and some simple kite designs. Also, as we want it to be a fun afternoon, we offer you two possibilities with different materials so you don’t have any excuses and you know how to make a simple kite.
Kite making materials to make a kite with a plastic bag
These are the materials you will need:
- 1 plastic bag
- 2 thin wooden or bamboo or metal sticks
- Rope
- Strong adhesive tape
- Kite string
- 1 coil or handle
- Acrylic paint
- Brush
Instructions to make a kite with a plastic bag
1. Shape the homemade kite
You have to cut the plastic bag with a more or less square shape, leaving two sides larger than the other two.
2. Let’s build the structure
First, the wooden sticks must be cut. One of them should measure 60 centimeters and the other should be cut to measure 50 centimeters. The longest stick is placed vertically, while the shortest stick is placed on top, right in the middle, perpendicularly, making a cross.
Then they must be tied very tightly, crossing the thread between the sticks until they are well attached and do not move. After this, a cut must be made very carefully at each end of each rod, and the thread inserted into each incision. When surrounding the rods there will be a kind of rhombus with the thread.
Made the structure, you have to stick it with adhesive tape on the kite. Flip the kite over and put a piece of tape right on the cross of the frame. This way, the plastic will be protected by the time you run the string.
Tie the flying string to the bridle, a little above center, tightening as you fly the kite.
3. Artists love to decorate
It’s time to get creative and decorate the kite. Detergent water can be used to help the paint dry better on the plastic.
4. The tail to the end
The tail is what gives the kite stability. Make one out of plastic, five times the height of the kite. And to fly!
Materials to make a kite with newspaper
If you want to build an ecological kite and teach children to take care of the environment, this is the perfect kite for you.
- Diary paper
- Bamboo twigs
- An old t-shirt or cloth to cut into strips (you can use paper instead)
- Liquid glue
- Scotch tape
- Fishing line
- Pair of scissors
Instructions to make a kite with newspaper
- Take your two bamboo branches and place them in the shape of a cross. Tie them with a fishing line.
- Cut another length of string that goes around the kite frame, from one end of one bamboo branch to another.
- Place the kite skeleton on top of a sheet of newsprint.
- Cut out any excess newspaper and attach the frame to the sheet with glue or tape.
- Cut an old t-shirt or cloth into strips to make the string you will fly your kite with.
How easy are our kite-making ideas?
TIPS FOR FLYING A KITE
Once the kite is finished, the most suitable place to fly is a beach or an open field. Avoid areas with trees, buildings or mountains. It is very important that there is light, or moderate wind and that you do the following:
- Unfold the kite so that the tail does not get tangled up with the line.
- The child must face the wind with the kite raised.
- Walk back about 20 steps, extending the line.
- Count to three, yank and simultaneously release and let the kite fly.
- Once you see that it hangs in the air, slowly release the rope so that it rises higher.
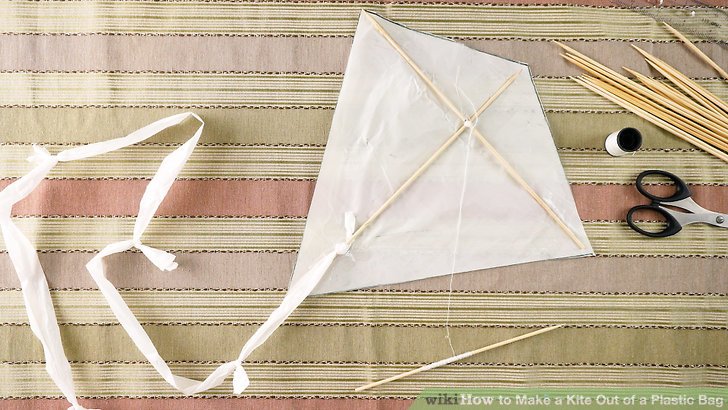
Image source: https://www.wikihow.com/Make-a-Kite-Out-of-a-Plastic-Bag
If you liked this proposal, do not miss our blog, where we have many ideas just as fun as this one.
We’re experts at creating personalized books for kids, so if you’re looking for a very special gift, explore our bookshelf of featured stories.